Cisco Collaboration Edge with Expressway
The Cisco Expressway provides secure firewall traversal for voice and video and supports many features, such as Business to Business calling and Mobile and Remote Access (MRA) as well as TURN server capability. As such, it is what is referred to as the Single Edge solution and is Cisco's preferred edge solution for Unified Communications and the Cisco Meeting Server.
For this lab, your Expressway-E should already be configured with some of the basics, such as a system name, a valid NTP server, a public DNS server, and a valid, signed Certificate, so these operations will not be required, but they will be pointed out, when important. It also has a Traversal Zone and a DNS Zone, which is to say, an established communications trunk for SIP to the internal Expressway-C, and a dynamic trunk that can establish SIP communication to external video services or Business to Business SIP calls to and from external customers. The dial plan to use any of these zones is not yet set up and will be covered later as a part of this lab.
The Expressway-E has two interfaces in our deployment, one facing the inside of the network and one facing the external, public internet. The advantage of using a dual interface configuration is that you are then able to deploy an address on the external interface that is statically NAT'd to a real outside address, instead of requiring a public IP address (or requiring NAT reflection by the external firewall, which isn't often supported). However, without any NAT requirements, the Expressway-E could be deployed with a single interface. The single-interface deployment would be very similar to the dual-interface deployment you will do in this lab.
Web Proxy Overview
As you have seen, the Cisco Meeting Server can provide access to users using WebRTC-enabled browsers. For those same users to have access the Cisco Meeting Server when on the Internet, you can configure the Web Proxy feature in the Cisco Expressway. This requires a number of configuration steps.
- Enable MRA to allow Web Proxy on Expressway-E
- Change Expressway-E Web Administration port
- Configure the UC Traversal server on the Expressway-E to tunnel signaling through the corporate firewall
- Create certificate for the Expressway-E
- On the Expressway-C, enable MRA
- Configure the UC Traversal client on the Expressway-C
- Configure CMS servers on Expressway-C
- Create certificate for the Expressway-C
- Enable the Expressway-E TURN service for media traversal
Enable Mobile and Remote Access (MRA)
The first step in setting up the edge is to enable MRA. If you are familiar with the MRA feature you may find this requirement to be non-intuitive. MRA relies on the web proxy feature of Expressway, so to enable the web proxy feature, you must enable MRA, even if you are not actually deploying the MRA solution. You may see alerts indicating that MRA is not configured properly or that a domain is not assigned. This is normal if you are deploying web proxy for CMS, but not deploying the full MRA solution. Follow these steps to enable MRA on your Expressway-E:
- Open the browser to the Expressway-E at https://expe1a.pod4.cms.lab
- Log in with username admin and password c1sco123.
- If prompted, click Skip Service Setup Wizard
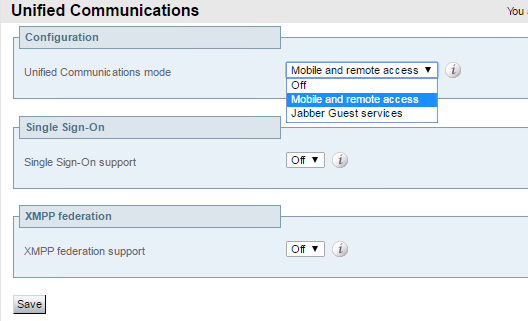
- Navigate to Configuration > Unified Communications > Configuration
- For Unified Communications mode select Mobile and remote access
- Click Save
Change Expressway-E Web Administration port
When you are finished deploying the Web Proxy, you want end users to be able to enter a URL in their browser and reach the CMS Web Bridge. If left unchanged, the default port number for the Expressway Web Admin is port 443, which means that instead of connecting to the Web Proxy and reaching CMS, users would connect to the Expressway Web Admin. You can change the port that the Web Admin uses so that the default HTTPS port, 443, can be used for Web Proxy. Follow these steps to change the port number for Web Admin:
- Navigate to System > Administration on Expressway-E at https://expe1a.pod4.cms.lab
- Near the bottom, find the Web administrator port setting and change it to 445
- Click Save
- You should see a message near the top of the screen that indicates System settings have been saved, however a restart is required for them to take effect. Don't bother with this now. You'll restart the server later on. Just keep in mind, the next time the system is restarted, you'll need to point the browser to port 445.
UC Traversal Server
The Expressway-E server typically sits in the DMZ and has an interface that is directly reachable from the Internet (and in some cases this address is a NAT'd address). Most firewall policies do not allow connections from the DMZ to the internal network. However, most firewall policies do allow connections from the inside to go out to the DMZ and Internet. The Expressway-E is configured as a traversal server where it can accept connections initiated from traversal clients, such as Expressway-C, that are on the inside network. This connection is then used for bi-directional communication, allowing messages from Expressway-E to be sent to the Expressway-C that established the traversal connection. For Web Proxy, this traffic is HTTPS traffic to and from a web client on the Internet, which requires a type of traversal zone known as a UC traversal Zone. This is different than the typical Traversal Zone used for Business to Business communications, so unless the MRA feature was previously deployed on your Expressway, this would be a new requirement.
For the traversal connection to work, the Expressway-E must have a user that the Expressway-C will later use to authenticate. Follow these steps to add this user:
- Navigate to Configuration > Authentication > Devices > Local database.
- You should see that a user, traversal has already been configured. This was used for the traditional Traversal Zone for Business to Business communication
- Click New
- Enter in the Name field.
- In the Password field enter . If pasting this value, use Control-V. Do NOT right-click and select Paste. Failure to do this properly will result in failures later in the lab.
- Click Create credential
Now configure the UC Traversal zone:
- Navigate to Configuration > Zones > Zones.
- Click New
- Enter in the Name field.
- For the Type, select Unified Communications traversal.
- In the Username field enter , the user created in the previous section.
- For the SIP Port, enter
.
Note: For this lab you will use port 7001 for the UC Traversal Zone because the Traversal Zone set up for you is using 7002. In a real environment, the port usage would depend entirely on what was already set up. You must use an unused port for this zone. - In the TLS verify subject name, enter , the Common Name of the Expressway-C's certificate which will be presented to the Expressway-E to create a secure connection between the two servers.
- Click Create Zone
Certificates
Certificates on the Expressway-E are extremely important, since clients, whether a web browser from an Internet user or another company trying to communicate with your enterprise, must be able to trust the authenticity of the server they're connecting to. Therefore, Expressway-E certificates, in particular, should be signed by a trusted public Certificate Authority (CA) (e.g. Verisign, GoDaddy, etc...). The Expressway-E also needs to trust the connections from its internal clients, which are the Expressway-C traversal client and CMS as a TURN client. Because of these two requirements, the Expressway-E should have the root certificate from both the internal CA that signed the internal device certificates, as well as the CA that signed its own server certificate, loaded into the Trusted CA certificate store. These steps have already been done for you to save some time, but follow these steps to look at what has been done:
Trusted Certificate Authority Certificates
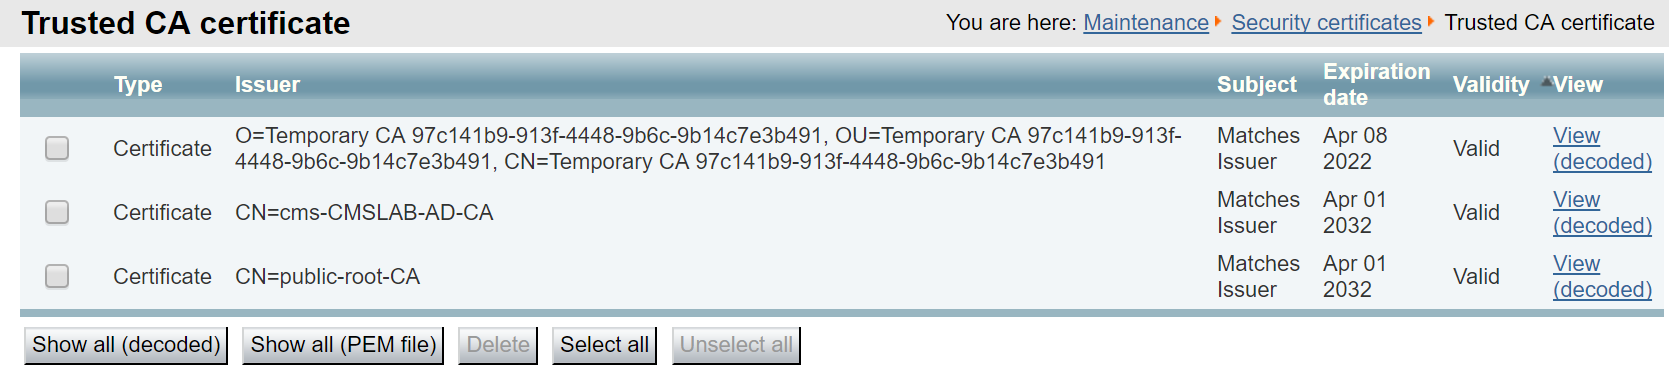
Open the browser to the Expressway-E and navigate to Maintenance > Security > Trusted CA certificate. You should see the self-signed CA certificate ("Temporary CA"), as well as the public-root-CA certificate, which will sign the certificate request from this server, and the cms-CMSLAB-AD-CA, which signs the internal server certificates, such as those from the Expressway-C and the CMS servers.
Although the Expressway-E has the root CA certificates, we need to check if it has a CA-signed server certificate. If it does not, you would first create a Certificate Signing Request, download the CSR, submit the CSR to the CA, and install the new certificate. But first, let's check.
Expressway-E Server Certificate
The Expressway-E server certificate has already been installed as well. To examine, open the browser to the Expressway-E.
- Navigate to Maintenance > Security > Server certificate
- In the Server certificate data section, next to Server certificate, click Show (decoded)
- If you scroll down in this certificate, you'll reach a section where it displays the X509v3 Subject Alternate Name, which will show DNS:expe1a.pod4.cms.lab, which is the host name of the Expressway-E and the DNS:join.pod4.cms.lab, which is the URL that external users will enter on their browser to access Web Bridge. The CMS have this last hostname in its own certificate, as well as the Expressway-E.
- Now that everything has been verified, reboot the Expressway-E. Navigate to Maintenance > Restart options, click Restart and Ok to confirm.
The system will now restart, which typically takes 2-3 minutes. The Expressway-E configuration is now complete. Don't forget that when it comes back, the administration GUI for Expressway will now be on port 445! While booting, you can continue with the next section by configuring the Expressway-C.
