API Overview
Up until now, you have used the MMP (CLI) and web-based GUI to configure all CMS functions. For some small deployments, this may be all you need. However, for more advanced deployments, configuration via the API is required. Even in smaller deployments, it is useful to be comfortable with the basics of API configuration. You may never need to create a full-blown application for interacting with CMS programatically, but understanding API basics is critical to many functions on CMS that are not exposed via any of the other administrative interfaces.
Traditionally, an API, or Application Programming Interface, is a set of routines, protocols, and tools for building software applications. It is also a specification as to how software applications can interact. In some sense, it is similar to the set of commands you can run and results you get back with a command-line interface. The difference is that a CLI generates output that is generally unstructured and easy for humans to read. APIs generate structured output that makes it easy for other programs to process and interpret that data. With the right tools, you can manually interact with the API and easily read and interpret the data.
With a CLI, you can often enter ? or some other help flag to get more information about what commands are available. That doesn't exist in an API; therefore, the API developer's guide is crucial to understanding what commands are available and how to use them. You can view the API Reference Guide here.
Cisco Meeting Server relies on a Representational State Transfer (REST) API. It uses the HTTP (or HTTPS) protocol as the underlying transport and is a stateless, client-server protocol, which means that if you're familiar with web-based URLs and their structure, you will easily be able understand REST. In REST, there are 4 supported types of operations, called verbs: GET, POST, PUT, and DELETE.
Most REST APIs treat these verbs similarly. Here is what they do in the CMS API:
- GET - retrieves some information from the server.
- POST - creates something on the server, like a new user.
- PUT - modifies an existing object.
- DELETE - deletes an object
For example, if you want to query the system status for the uptime and software version, you would send a GET request to the CMS server. The API reference tells you that the uptime can be found by using the GET method on /system/status. Below is an exceprt from the CMS API Guide:
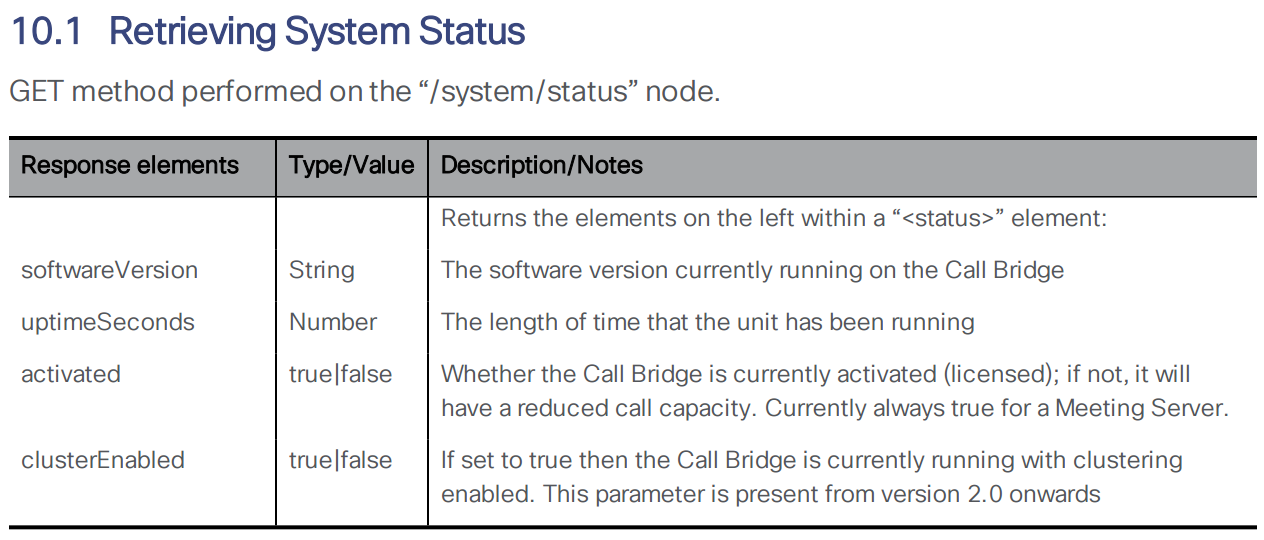
For the CMS API (and many RESTful APIs) all of these commands require /api/v1 as the base URL. This is documented in the API reference guide. The full URL to get the uptime of cms1a is therefore https://cms1a.pod2.cms.lab:8443/api/v1/system/status (username: admin password: c1sco123). You must use port 8443 because that is the Web Admin port you configured earlier. If you go to this link using a standard web browser, it will ask you to authenticate. You can use the same admin credentials you have been using for Web Admin. Once you do, you will get a result in XML format.
You can use a web browser to send basic GET requests like the one above, but for more complicated requests and to send a POST, PUT, or DELETE, you must use different tools. You could write a program using a variety of programming languages (Python, Java, .NET, and so on...), but there are ways to access the API without having to write a line of code. There are many applications available that allow you to interact with a REST API. One such application, that you will use in this lab, is called Postman. (Postman has already been installed for you, but for your reference, you can download Postman at https://www.getpostman.com/.)
Add API User
The default admin user has full access to the API, however it is best practice to create a dedicated user for API access. This is done from the MMP (CLI). Follow these steps to add an API user on each of the servers. These users are locally-significant, so you must configure the API user on each server individually.
| Cisco Meeting Server Name | Password |
|---|---|
On cms1a, enter the command user add apiadmin api to create a user named apiadmin with the api role. The password should be set to c1sco123:
You can use the user list command to confirm that the user was added.
The apiadmin account has already been created on CMS1b and CMS1c, so there is no need to configure anything there. Although the database is clustered in our lab, it is always a good practice to enable the same API account on all servers. For some parameters, such as ad-hoc conferencing and load balancing parameters, it is mandatory.
Postman Overview
Now you will get familiarized with the Postman application.
The first thing you should do is have Postman ignore SSL certificate verification. If you are using certificates signed by a trusted CA in your production environment, you may not need to do this; however, for our lab this is necessary. Perform these steps:
- From the Desktop of your laptop, launch the Postman application
- Click File > Settings
- On get General tab, change the SSL certificate verification option to OFF (greyed out).
- Click the X to close the Settings window.
Now you are ready to attempt your first request. Here is what the Postman UI should look like:
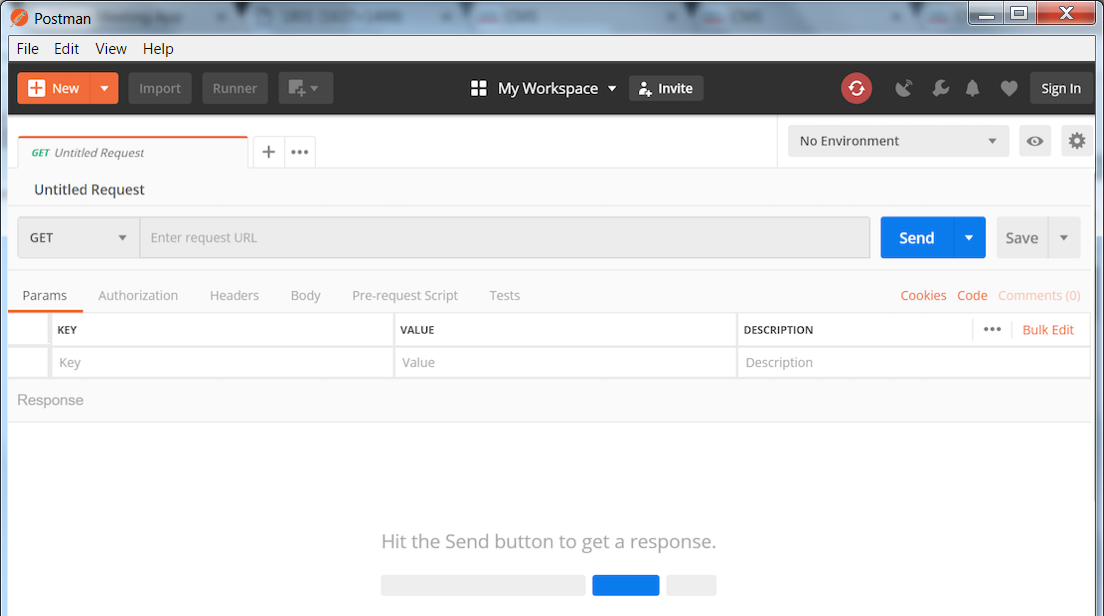
- Notice the default request type is GET. If you click on GET you will see a long list of methods supported by Postman. You will only be needing GET, POST, PUT, and DELETE for the CMS API. Leave this set to GET for now.
- To the right of GET, you should see a field that says Enter request URL. This is where you will enter the URL to which you send the query. Enter the following URL into this field: https://cms1a.pod2.cms.lab:8443/api/v1/system/status
- CMS requires authentication for the query, so you must tell Postman to send the credentials along with the request. Below the GET button, there is an Authorization tab. Select it now.
-
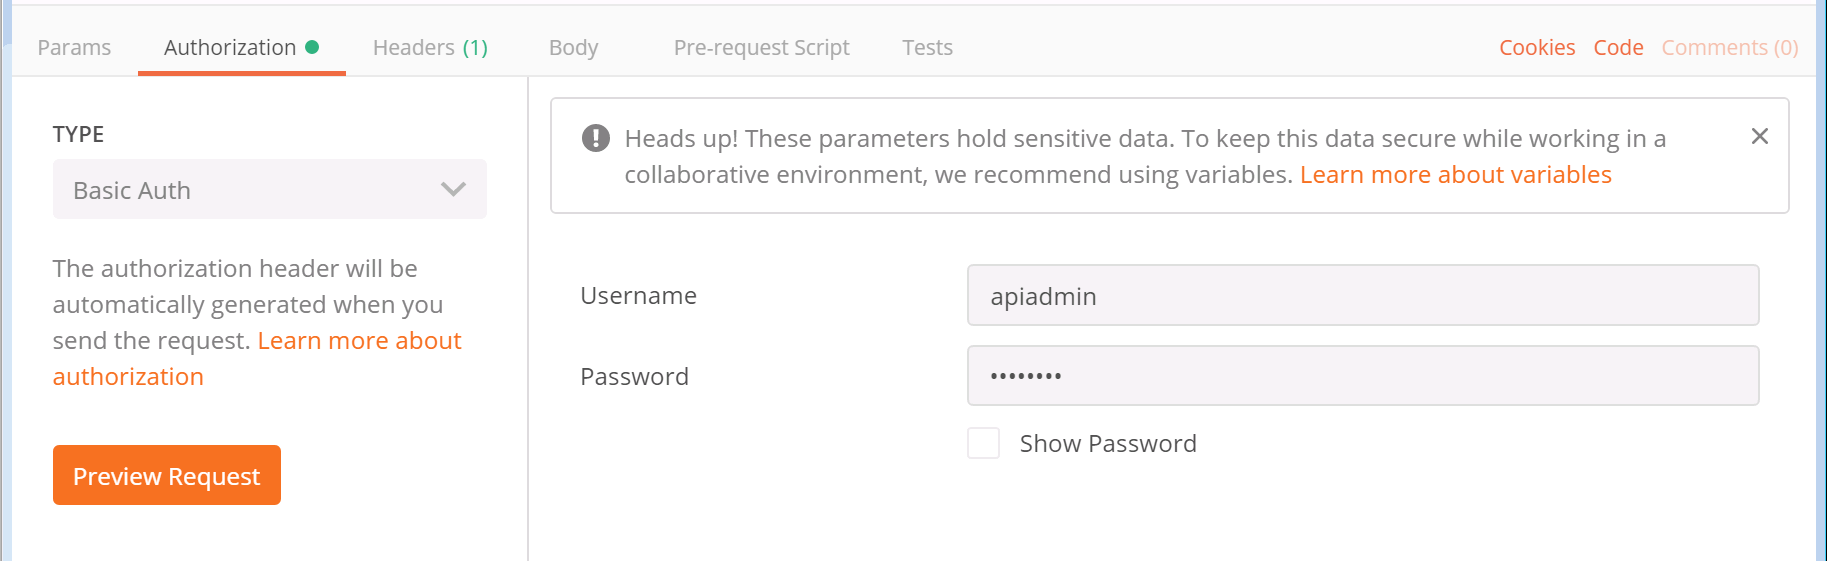
For the Type of authorization, select Basic Auth from the drop-down
- After selecting Basic Auth, you should see a section to add a Username and Password. You should use the API user credentials you created earlier in this section. The username is apiadmin and the password is c1sco123.
- Finally, click the blue Send button.
- The response is now shown in the pane below at the right side. You will notice that there is a Status message with a 200 OK. This is extremely important to check each time you send something, just to be sure the request was understood by the server, meaning there was no typo or an invalid parameter used, or even an authentication failure.
- By default, to the left in the Body, the results are shown in Raw format, however if you select the tab that says Pretty, you should see the system version and uptime in seconds, along with several other parameters. You'll notice clusterEnabled is true, since you have configured clustering already.


You have sent your first successful API GET request!